Detailed instructions on how to install and run MONAI Label can be found on the official MONAI website (https://docs.monai.io/projects/label/en/latest/installation.html), but the below instructions will get you started quickly.
GPU support
If you have a decent NVidia GPU, you should first download and install the CUDA Toolkit 11.3 at https://developer.nvidia.com/cuda-11.3.0-download-archive?target_os=Windows.
If not, you can continue without installing this and all models will run just fine on the CPU.
Install MONAI Label (Windows)
Download and install the Windows version of Python 3.9 (not a newer version!) from https://www.python.org/downloads/release/python-390/, which will be indicated as “Windows x86-64 web-based installer” .
Open a Command Prompt in Windows and make a folder where you want MONAI Label to place its files such as C:\MONAI in the below example.
Navigate to the root of the C: drive:
C:\Users\Name>cd/
Make a directory named MONAI:
C:\>md MONAI
Navigate into the directory:
C:\>cd MONAI
Install pip:
C:\MONAI>python -m pip install --upgrade pip setuptools wheel
Install pytorch:
C:\MONAI>pip install torch==1.12.1+cu113 torchvision==0.13.1+cu113 torchaudio==0.12.1 --extra-index-url https://download.pytorch.org/whl/cu113
Install working version of MONAI Label:
C:\MONAI>pip install monailabel==0.7.0
Install compatible version of MONAI:
C:\MONAI>pip install monai==1.2.0
For Pathology (windows)
Download the OpenSlide zip file from https://openslide.org/download/ (Windows Binaries 64-bit).
Extract all the files to a folder.
Add the OpenSlide bin directory to the Windows PATH Environment Variable:
1. Open the Start Search, type in “env”, and choose “Edit the system environment variables”.
2. Click the “Environment Variables…” button.
3. Under the “System Variables” section find the row with “Path” in the first column, and click edit.
4. The “Edit environment variable” will appear where you can click “New” and “Browse…” to select the bin folder inside the OpenSlide directory (e.g. “C:\openslide-win64-20230414\bin”).
5. Close all the windows by clicking OK.
Download all the files required for running a pathology model
C:\MONAI>monailabel apps --download --name pathology --output apps
Download all the models and start a local server:
C:\MONAI>monailabel start_server --app apps/pathology --studies apps/images
For Radiology
Download all the files required for running a radiology model
C:\MONAI>monailabel apps --name radiology --download --output apps
Download the radiology models and start a local server:
C:\MONAI>monailabel start_server --app apps/radiology --studies apps/images --conf models segmentation,segmentation_spleen
For Endoscopy
Download all the files required for running a endoscopy model
C:\MONAI>monailabel apps --download --name endoscopy --output apps
Download the monaibundle models and start a local server:
C:\MONAI>monailabel start_server --app apps/endoscopy --studies apps/images --conf models tooltracking
For Model Zoo/Bundle
Download all the files required for running a model from the MONAI Model Zoo/Bundle
C:\MONAI>monailabel apps --name monaibundle --download --output apps
Download the monaibundle models and start a local server:
C:\MONAI>monailabel start_server --app apps/monaibundle --studies apps/images --conf models wholeBody_ct_segmentation,wholeBrainSeg_Large_UNEST_segmentation
Run MONAI Label in ScanXm
Load the image or volume in Scanxm as normal.
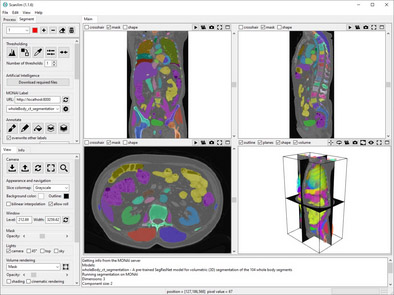
In the Segment panel there is a section named MONAI Label. Here the URL should be set as http://localhost:8000 in case a local server is used.
When you press the Reset button, the available models will appear in the dropdown box.

Select the model you wish to use in the dropdown box and press the run button to let MONAI Label generate the segmentation. Within a few minutes the segmentation will appear in ScanXm.


